Setup Autonomi Launchpad On Linux (Ubuntu 24.04)
Getting started
You will need the following:
- Current Autonomi link of Launchpad for Linux (Intel or ARM)
- An Arbitrum One Wallet address. MetaMask example here
- 35GB storage/node
User choice
There are two options for running your Launchpad:
sudo/root user
In this scenario, Launchpad will create a new user called ‘ant’, that will be used to run the worker nodes. This is safer than running the nodes as the super user.
non-root user
Here, Launchpad will spin up worker nodes as your specified user.
Storage location
By default, Launchpad creates the node information in ~/.local/share/autonomi
![]() This has a side-effect that running nodes as sudo/root creates the nodes in /root/.local/share which the ant user does NOT have access to, and will crash when trying to run.
This has a side-effect that running nodes as sudo/root creates the nodes in /root/.local/share which the ant user does NOT have access to, and will crash when trying to run.
The two launchpad solutions are:
- run launchpad as a non-root user
- mount an additional drive/partition that the ‘ant’ user can access
Let’s Begin
Getting the client
wget https://node-launchpad.s3.eu-west-2.amazonaws.com/node-launchpad-0.5.8-x86_64-unknown-linux-musl.zip
Login to your system, and pull down the client using wget. If unzip is not installed by default, it is quick to grab…
sudo apt update
sudo apt -y install zip
sudo apt clean
We update the system packages information, install the zip package and clean the packages cache to save space.
unzip node-launchpad-0.5.4-x86_64-unknown-linux-musl.zip
Now we can unzip the launchpad and start it with ./node-launchpad.
Launchpad
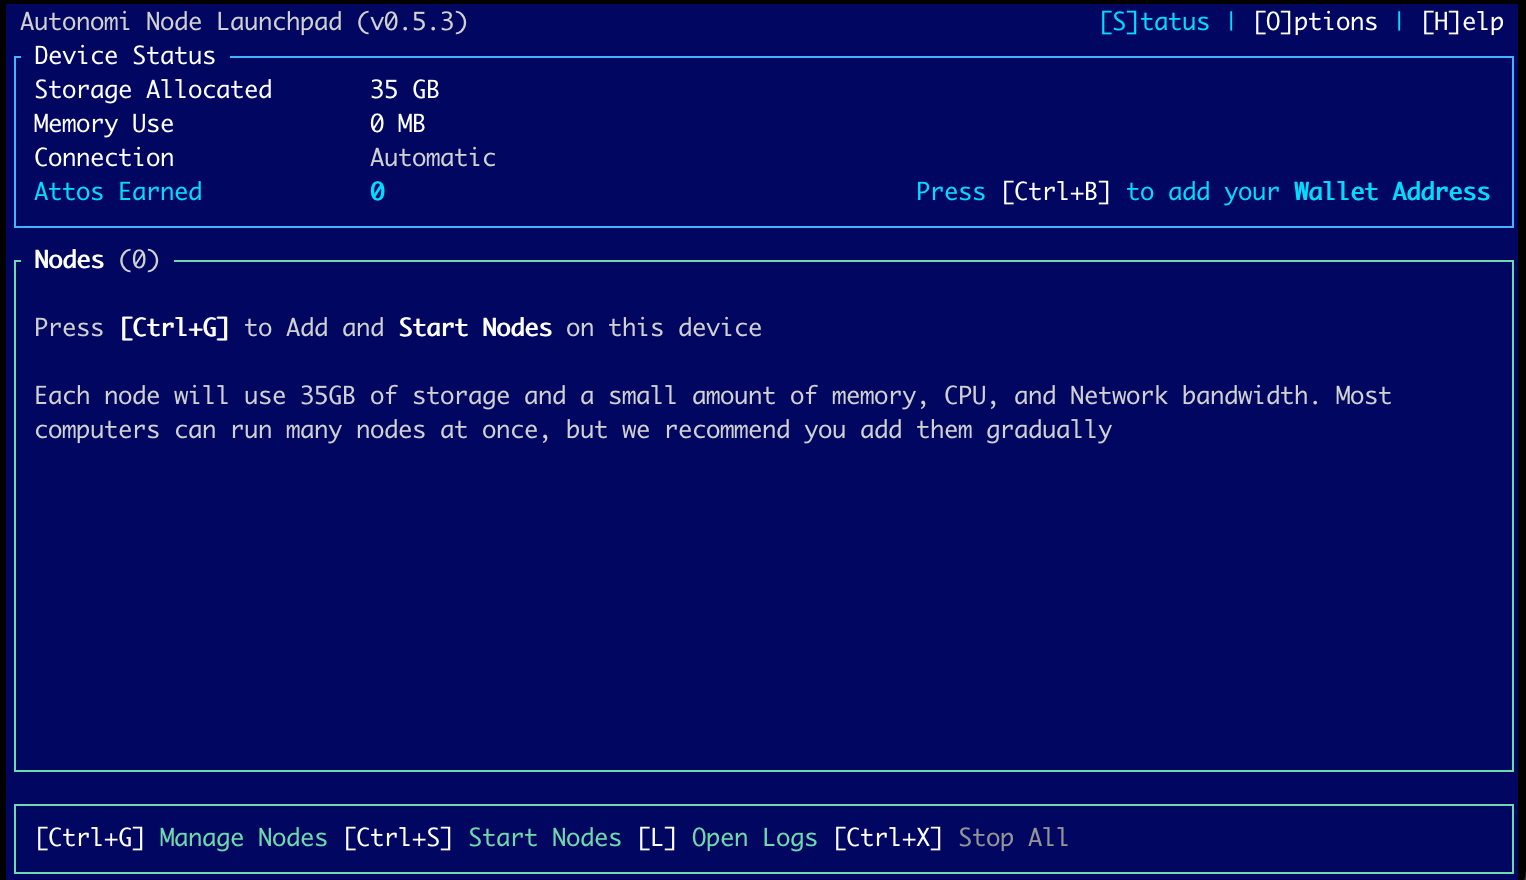
This is our unconfigured Launchpad dashboard. As we make changes, we will automatically navigate back to the [S]tatus page. Use the [O] letter key to navigate to the Options screen.
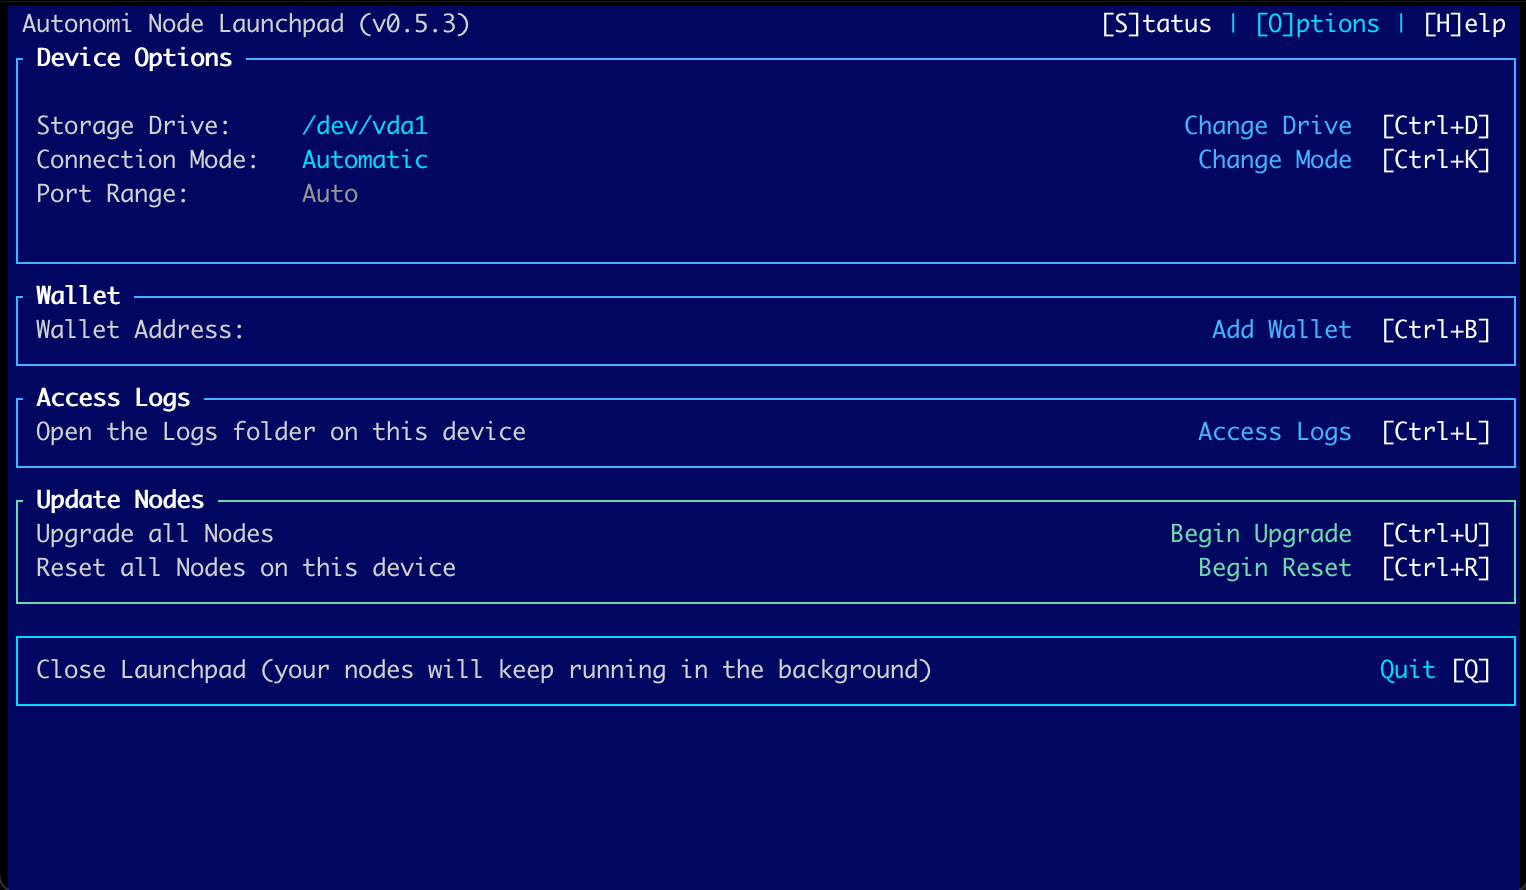
This is the unconfigured Launchpad Options screen. From here we’ll make changes to setup our nodes.
Storage Drive
As mentioned previously, your instance will by default store data in the ~/.local/share folder, which is usually located on the primary disk/partition. This may not be ideal as it’s smart to have extra space for logs on the primary partition and to have our data mounted as a separate disk/partition.
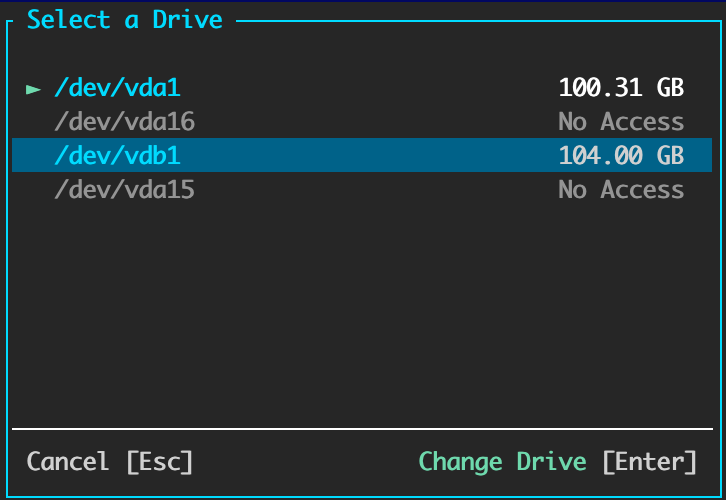
To change the storage option, press [Control+D] and select the Drive.
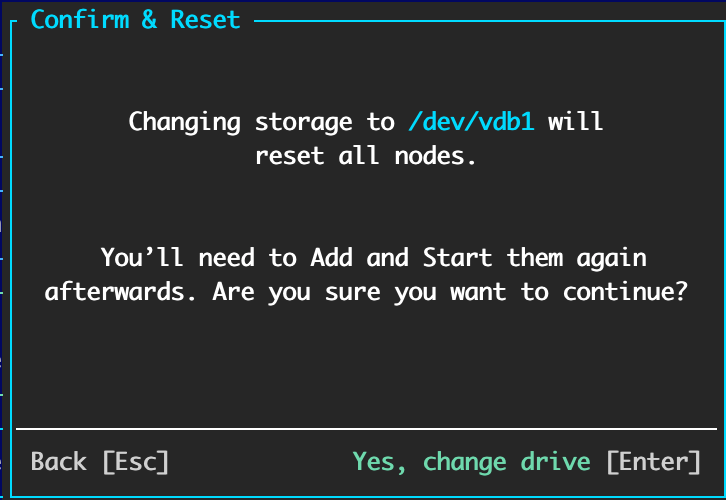
As with most settings, changing the storage location will require any existing nodes to be reset. Press the [Enter] key to continue.
Network Connection Mode
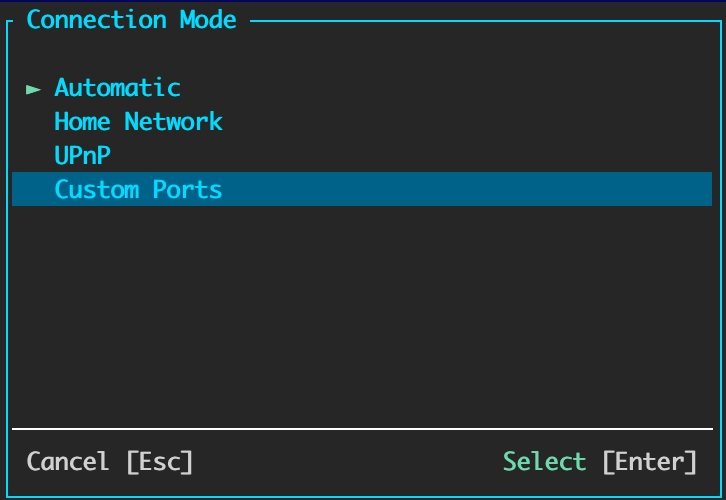 Press the [Control+K] key.
Beyond Automatic, there are three Connection Modes to access the network.
- UPnP attempts to use Plug-n-Play to configure your router to connect to your nodes.
- Home Network uses relay nodes to send/receive traffic.
- Custom Ports allows you to define which ports your nodes use instead of being chosen automatically.
I’m going to use Custom Ports in this example, which means that I have to map the firewall/router ports to my instance. (A topic not covered here as it’s too broad to cover all the various routers available).
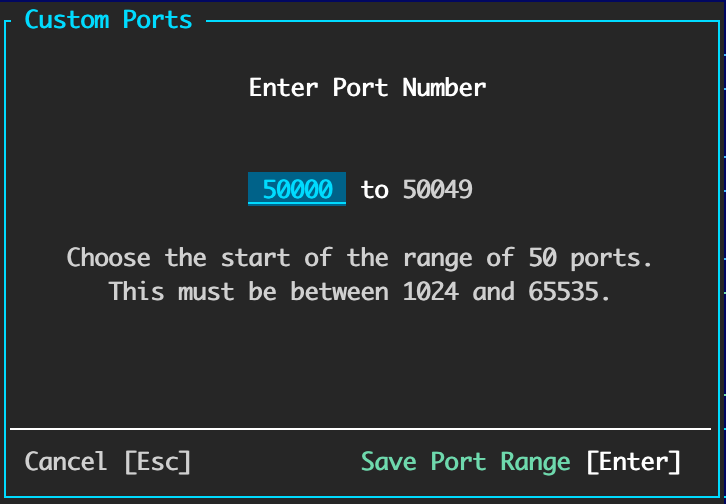 Here I’ve chosen port 50000 which selects the next 50 ports (the maximum that Launchpad allows).
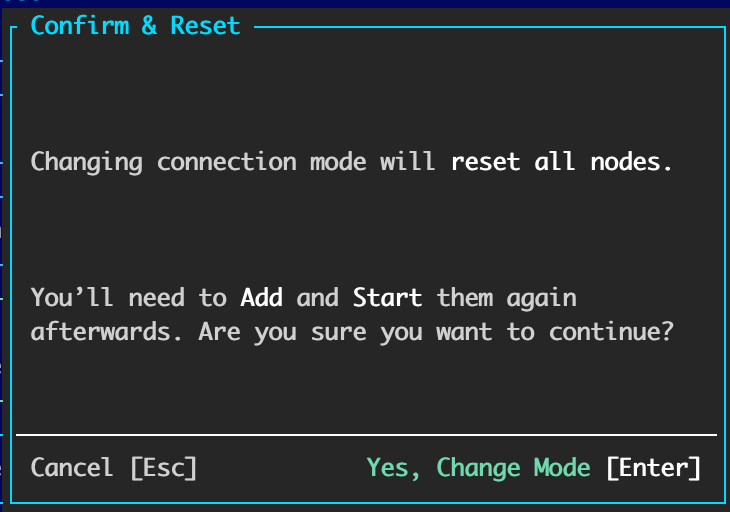
Then we confirm the changes.
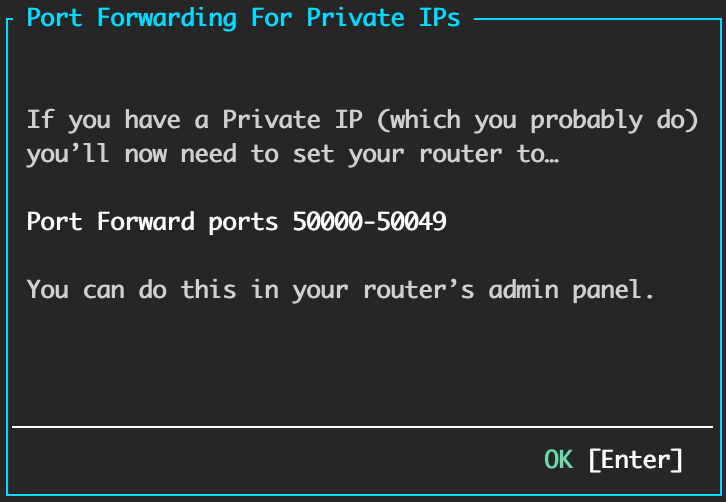 And here Launchpad alerts us to setup port forwarding from our router.
Add your wallet
Our rewards for storing content are paid on the blockchain, this requires us to have a valid address if we want to get paid.
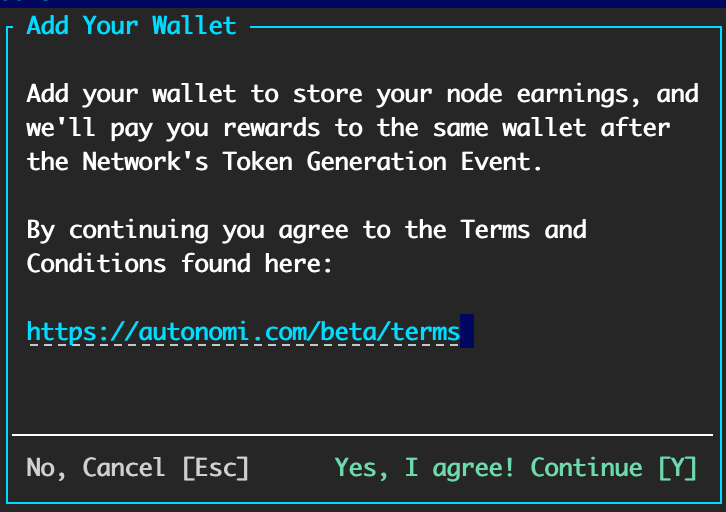 Press the [Control+B] key.
First up, we need to agree to the Terms of Service by pressing [Y].
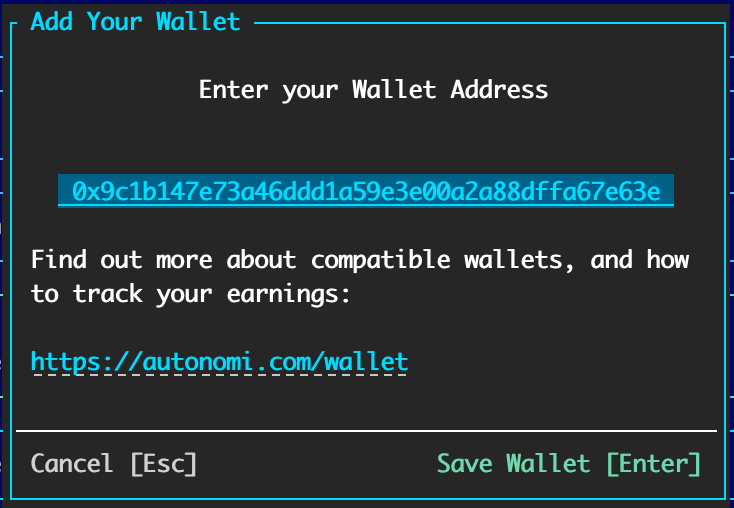 Then we enter a valid wallet address and continue with [Enter].
All Ready To Go
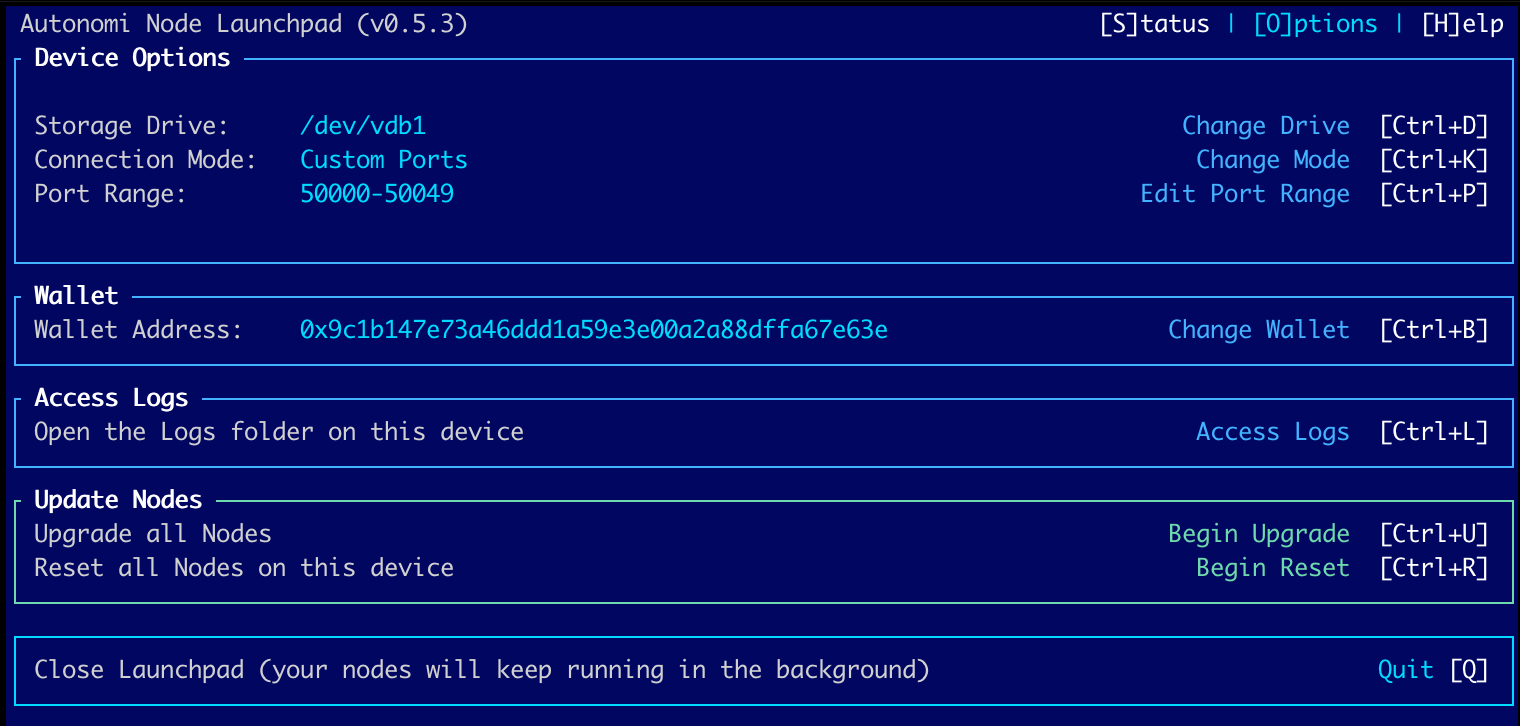 Now we can review our settings before we begin to launch nodes.
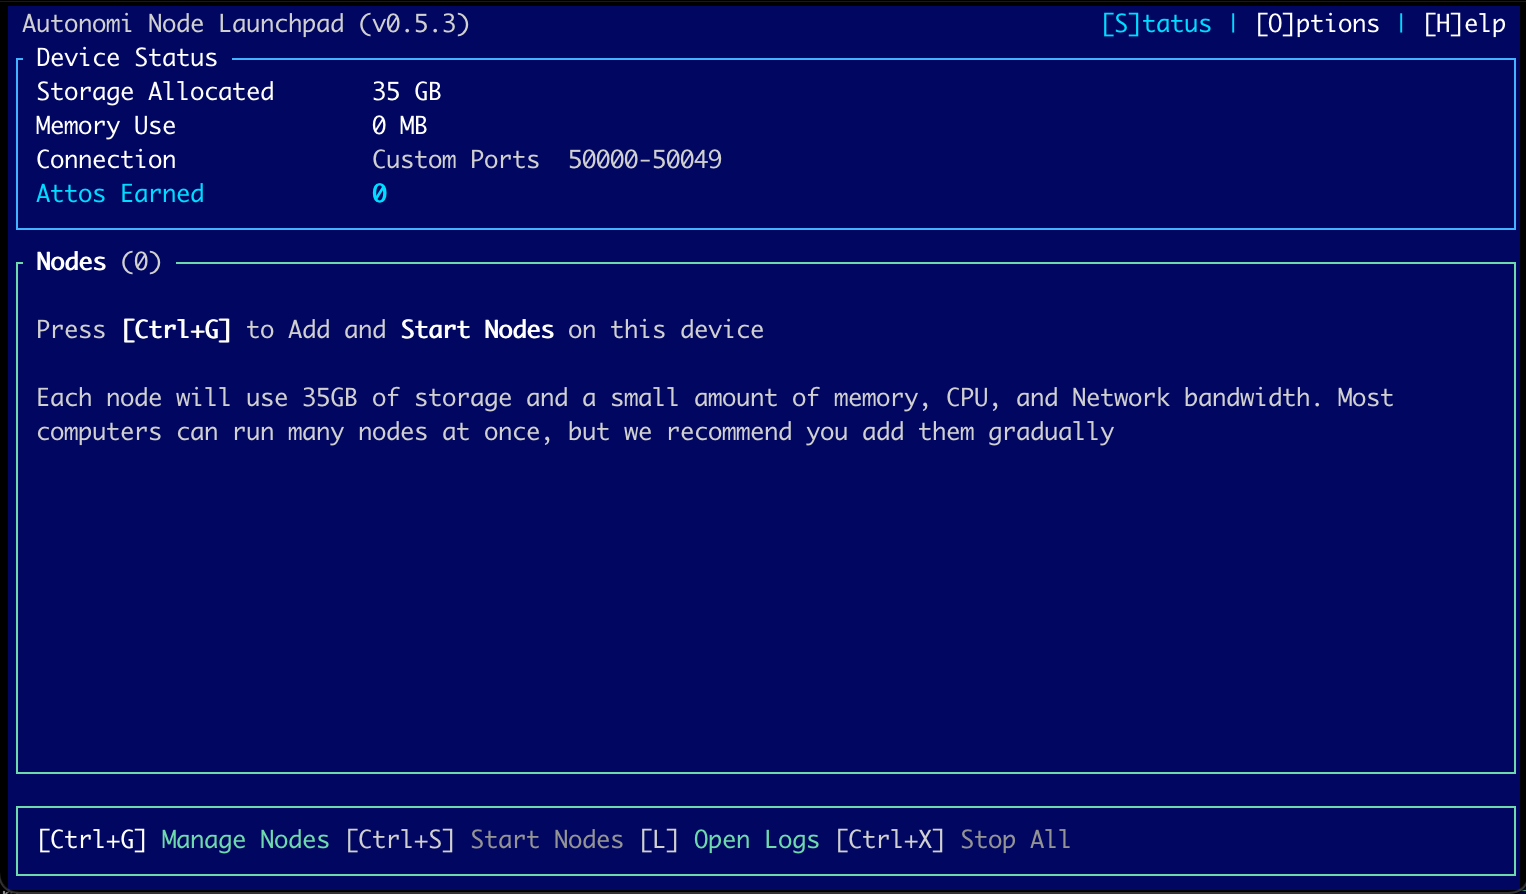 Press the [S] key to get back to the Status screen.
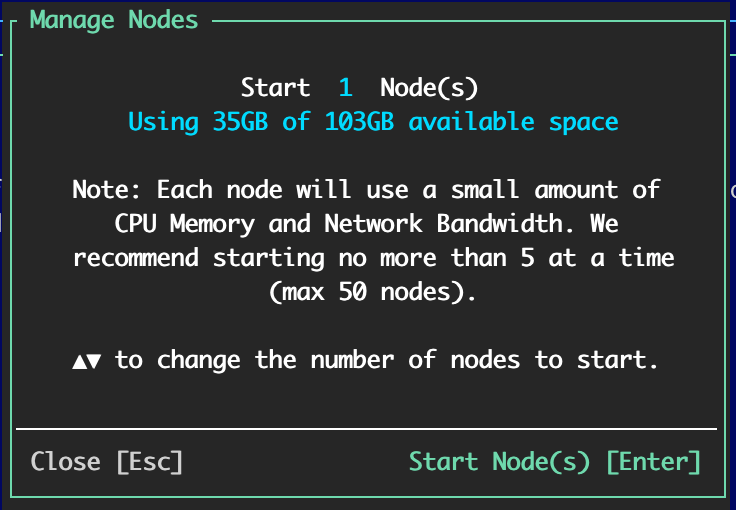 Press [Control+G] to begin manage nodes. We’ll start with 1 node, you can use the arrow keys to change the total number of nodes to manage. Press the [Enter] key to confirm.
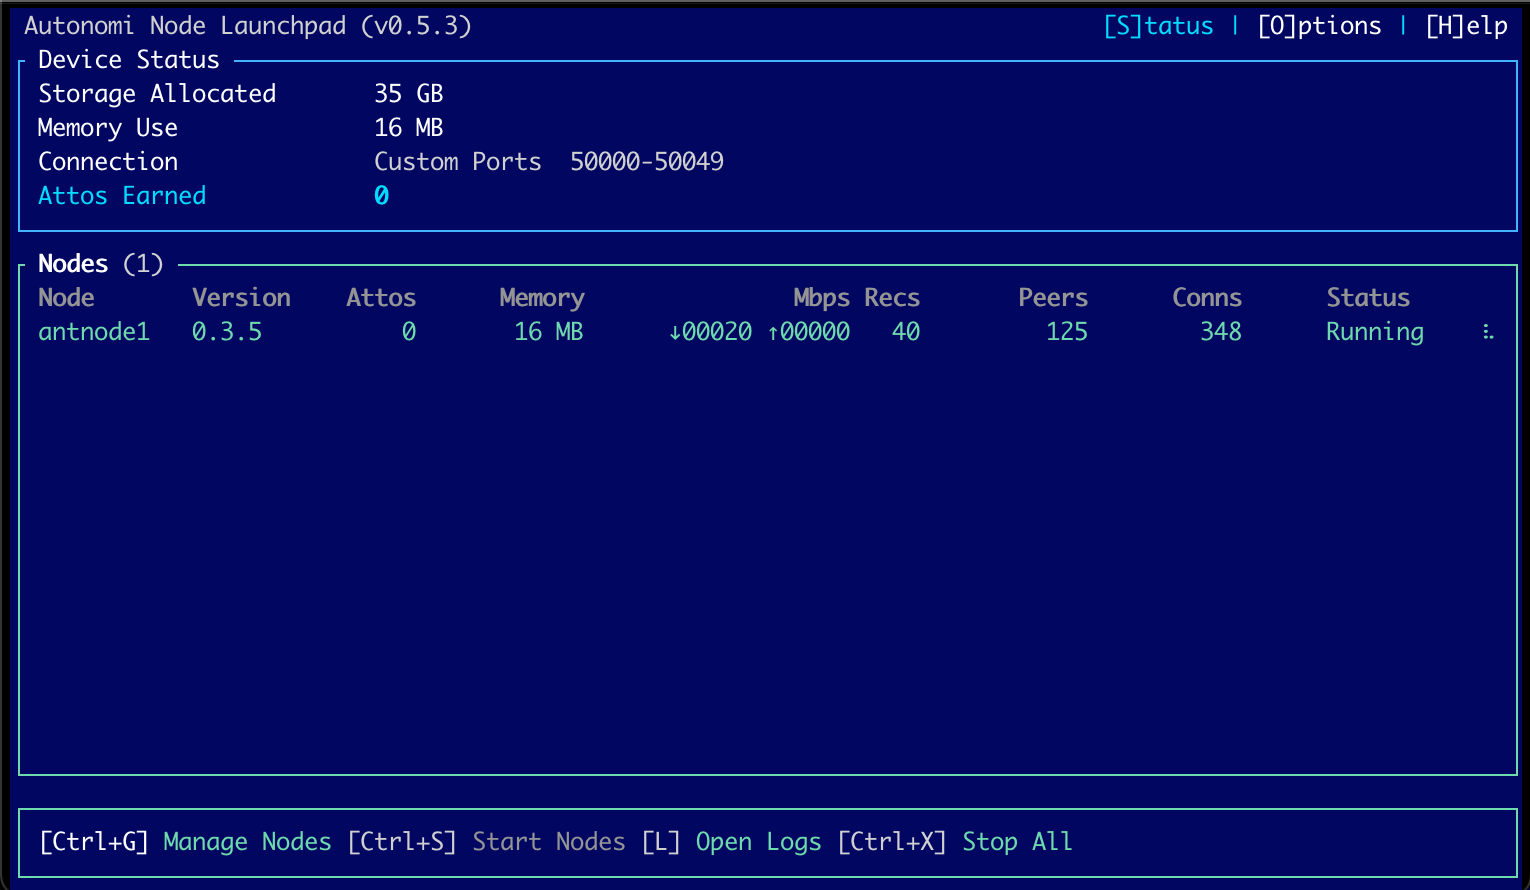 And finally we can see the node running in Launchpad.